How To Use Masterbuilt Propane Smoker
If you got your hands on a brand-new Masterbuilt Propane Smoker and now find yourself on a voyage with a purpose to find out how to use this smoker like a pro then fret not, we bring you great news because you have just discovered the right place!
Smoking food may be hard but it is definitely not impossible. A little practice makes everyone learn a thing or two from their mistakes, and that is why in this article we bring you everything you need to know about a propane smoker so you can impress your friends and family. So go ahead and give this article a read so you can throw a party of a lifetime at the back of your house!
Established in 1973, Masterbuilt is a brand known for its revolutionary fryers, grills, smokers and many other accessory products to ease up your cooking process. It has many different types of smoker such as propane smoker and electric smoker.
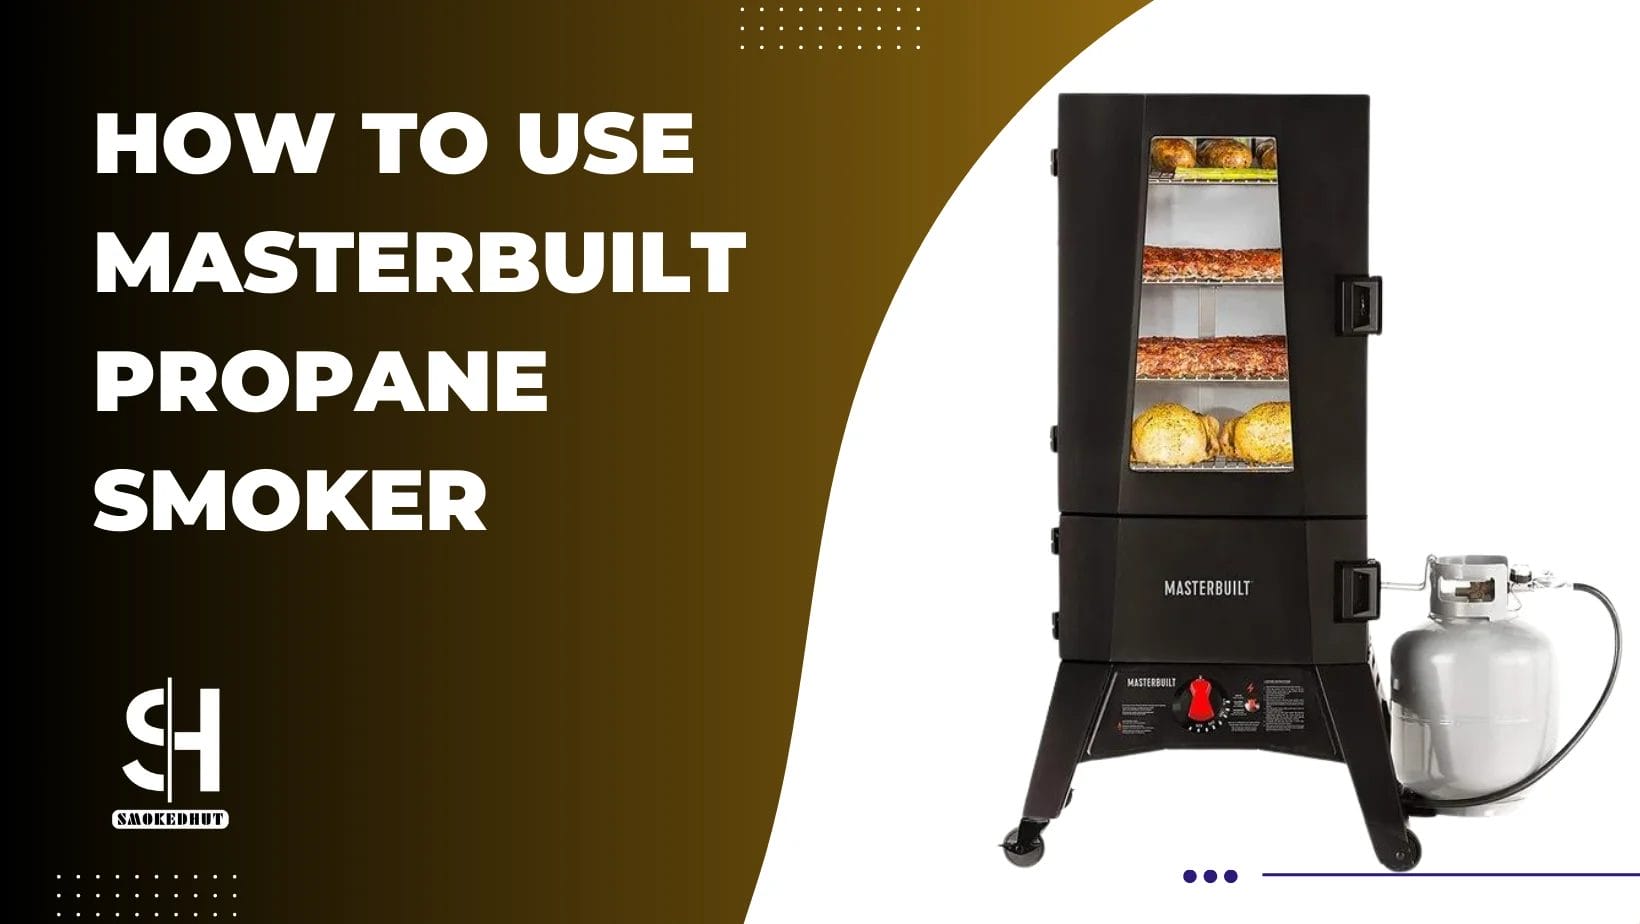
Although Masterbuilt has manufactured uncountable best propane smokers so far, in this article we will be considering its all-time classic model so we can easily explain things to you. And for that we have chosen Masterbuilt’s Two Door 40 inch Propane Smoker.
What is a Masterbuilt Propane Smoker?
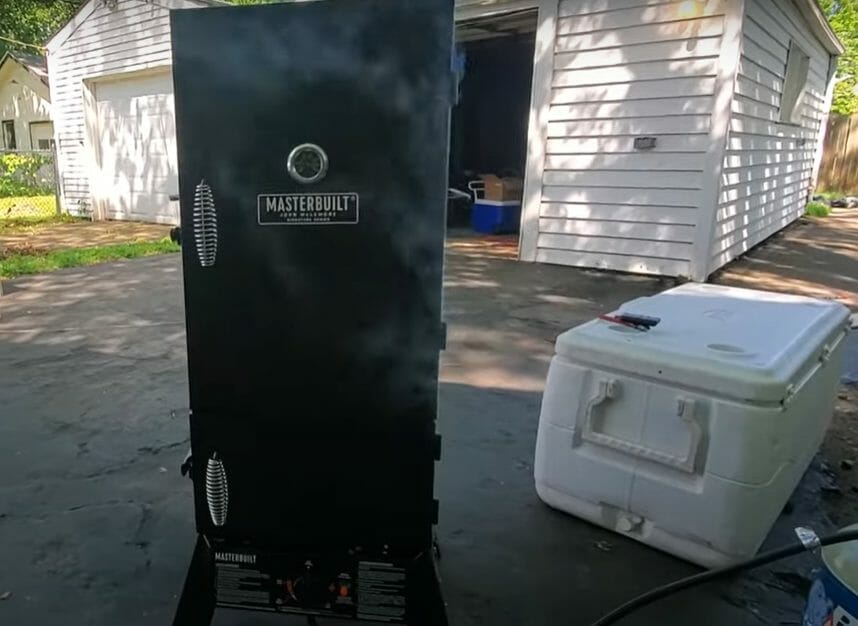
The name itself says it all. Masterbuilt Propane Smoker uses propane as a source of fuel to smoke up and cook up your food. This smoker is specifically build up for outdoor cooking, in other words, it is portable!
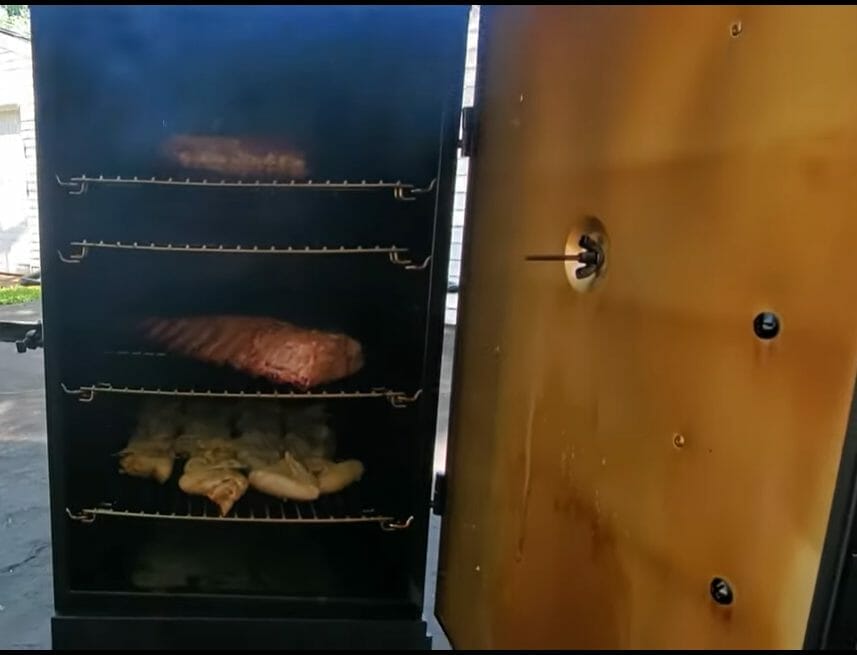
To master the art of smoking, Masterbuilt Propane Smoker comes with a removable water pan and wood chip tray. Moreover, it has four chrome-coated smoking racks and a built-in temperature gauge that tells you the temperature inside so you can take things measurably fast or slow and get the desirable result.
Another impressive feature of this beauty is that it comes with two doors! This means you can add more wood chips or water without having to worry about losing the smoke.
Assembling this monster box is way easier than solving a quadratic equation (I have been there and I am not even kidding). Masterbuilt Propane Smoker’s manual comes with detailed instructions (and very graphic too!) so even if you are a newbie, this portable propane smoker won’t give you a hard time assembling it.
How to season a Masterbuilt propane smoker
Seasoning a Masterbuilt Propane Smoker is a piece of cake. There is no rocket science required. All you got to do is ignite it and let it burn for around two to four hours or more – it depends on how much heat you are supplying your smoker with. However, there are few crucial steps that must be kept in mind before starting the seasoning process.
Before we move on to those crucial steps, you must be wondering, is it really important to season?
To answer your question, yes, it is important to season your smoker. Smoking without seasoning is like inviting your special guests – and I am talking about some real VIPs – at your dirty house!
Seasoning takes off all the chemicals and odors left after its manufacturing process in the factory. So even if you are thinking of skipping the seasoning part, know that your first smoked meat will taste like plastic, raw metal and all the chemicals used in the factory to make this smoker. Seasoning also makes your smoker contaminate-free and prevents it from corrosion – making it useful for a long period of time.
Now that you know about the importance of seasoning, let’s move on to its crucial steps that should not be missed at all.
Seasoning – A Step-By-Step Guide
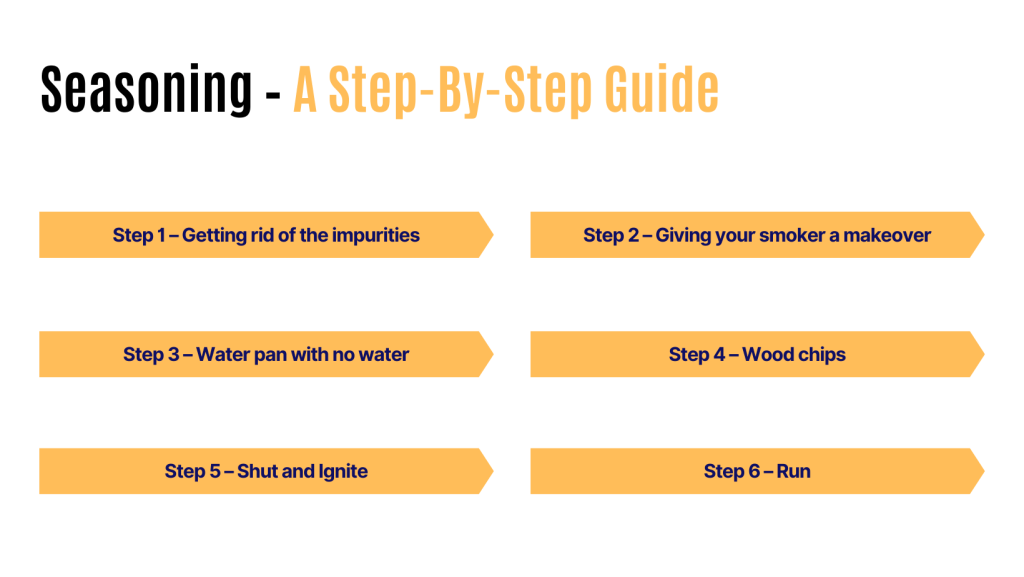
Step 1 – Getting rid of the impurities
Before seasoning or assembling, many people say to wash all the removable parts of a propane smoker such as racks, water pan and chip tray, and to wipe away the interior chamber of the smoker with wet cloth as well.
But I firmly believe it is a total waste of time and that the high temperature itself has the ability to kill off all the impurities alone – a true warrior indeed.
So let’s say this step is entirely optional and I have just written it to include myself in the majority and make myself look cool.
Step 2 – Giving your smoker a makeover
Once everything is dried after washing the parts (optional) and assembled (definitely mandatory), its time to coat or spray the interior of the smoker with cooking oil. You can use any type of cooking oil but it all truly comes down to three things – affordability, availability and of course effectiveness! And who would want to work for hours and not get any fruitful result? Definitely not me.
Grapeseed oil and canola oil are mostly preferred if you want to get your seasoning done in a cheaper price.
So pick up your spray bottle or a brand-new paintbrush if you are feeling more like a Picasso and give a light coat of oil to your racks, the inside of the door and unit.
Step 3 – Water pan with no water
This is where seasoning and smoking differ. While water is mandatory for moisture in smoking, it is definitely forbidden when it comes to seasoning. Just because you got a water pan does not mean it should always be filled with water!
The main purpose of water pan is to increase the humidity when you are smoking that huge chunk of meat.
Make sure the pan in your smoker is devoid of even a single drop of water because remember we are trying to get the smoke here not steam.
Step 4 – Wood chips
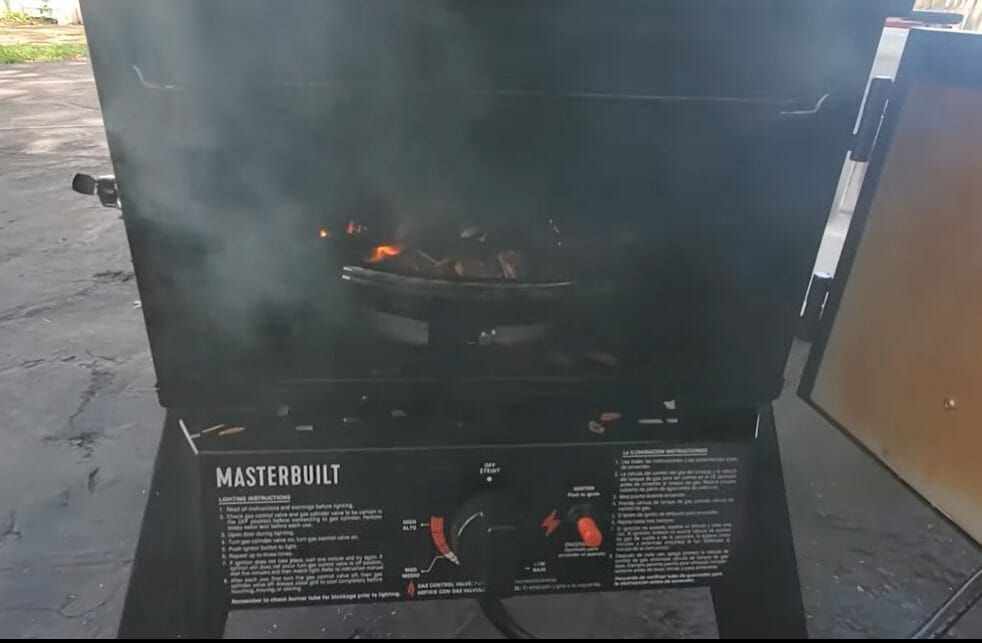
Add about 1 cup of dry wood chips in the wood chip tray. You will find this tray above the burner. The main purpose of wood chips is to get that smoke in your smoker which gives the perfect flavor to your meat, however, remember that we are seasoning here not smoking.
Step 5 – Shut and Ignite
Shut the doors of your chambers and seal it tight with the given latch. Now turn on the valve of your propane tanker because guess what? Its seasoning time!
Before turning on the burner, make sure there is no gas leakage from the valve or its hose. You can do so by performing a soapy water test. All you have to do is apply the solution to the entire pathway that the gas travels before entering the smoker and look out for the bubbles!
Step 6 – Run
Not you, obviously. I am talking about the propane smoker! After pushing the ignitor button and igniting the burner, set the temperature to the maximum temperature your smoker allows. In seasoning, the temperature must be greater than that used in smoking.
Now let the propane smoker run for 2 to 4 hours and keep an eye on the wood chips because the woods itself are the source of smoke! Keep adding more if it burns out.
Once done, let the smoker cool down and repeat the above guidelines again but this time do it for 20 to 30 minutes only.
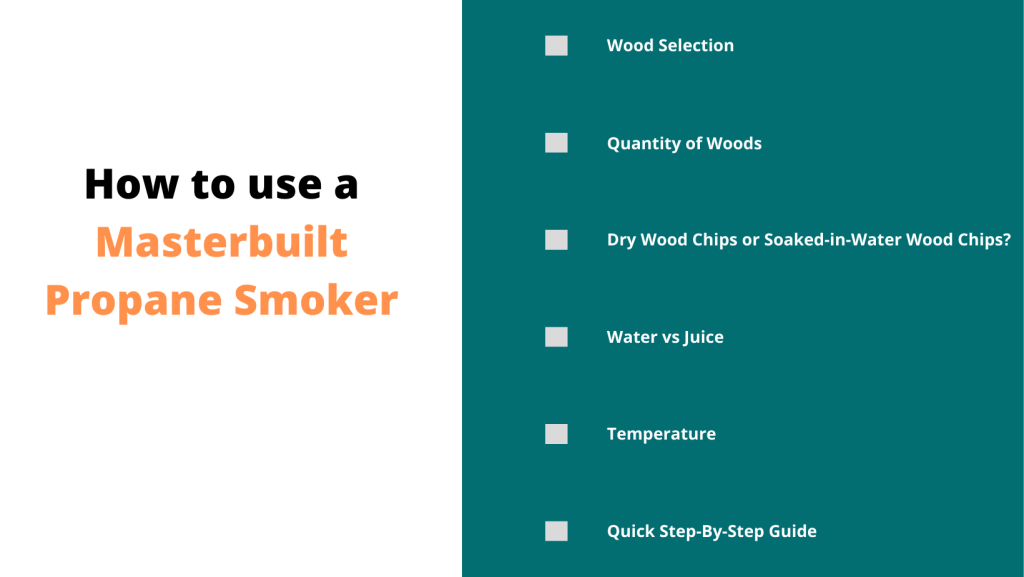
How to use a Masterbuilt Propane Smoker
If you know everything about seasoning, you can safely consider yourself an expert because smoking shares a lot of similarities with seasoning. But then again, to consider these both things entirely similar is a very foolish thing to do.
Before we move on to the quick guidelines of how to use a Masterbuilt propane smoker, let’s talk about few things one should be aware of before starting the smoking process.
Wood Selection
Wood selection may sound absurd but it really is not. Adding wood chips in your smoker naturally enhances the flavor of your meat and gives off that irresistibly pleasant aroma which could get your tummy grumbling.
Wood comes in different shapes, sizes and flavors as well. But in this article we are primarily focusing on the wood chips and its different flavors. Choosing the wood chip for your smoking process comes down to one thing – whether you like your meat with strong flavor or with a lighter tone of taste.
For your ease, we have made a list of commonly used wood chips and the specific flavors they rub off on the meat.
| Wood Name | Flavor |
| Hickory | Sweet and smoky, adds strong flavor to meat |
| Mesquite | Slightly sweet and Intensely earthy or smoky, gives stronger flavor |
| Pecan | Fruity and nuttier, adds slightly strong taste |
| Apple | Slightly sweet, smoky and fruity, gives light taste |
| Oak | Smoky flavor, not too strong and not too light – gives mild flavor to your food |
Quantity of woods
If you are wondering how much wood chips to use in a Masterbuilt Propane Smoker then worry not, we have got you covered here as well.
The quantity of wood chips mainly depends on the cooking time. The longer you smoke, the more wood chips you will be needing. It is said that 2 to 3 handful of wood chips lasts for about an hour, so if you like your meat lightly smoked then this won’t be a problem for you. However, if you are not a fan of lightly smoked meat then you might need more packets of wood chips for a longer smoke.
Dry Wood Chips or Soaked-in-Water Wood Chips?
Another controversial topic that requires us to pretend like we are a bunch of scientists. Dry Wood chips does not waste a second to give you what you want – the beautiful sight of smoke spilling from your smoker. Soaked wood chips, on the other hand, are lousy and wait for the heat in chamber to evaporate all the water it has before creating the smoke.
However, just like the blue-black or white-gold dress, the world is still divided on this one. So, we have concluded that it all comes down to what you prefer and which one gives the better result.
Water vs Juice
Both are liquid and make the cooking environment humid enough to give the moisture to the meat that is being cooked. However, the real question is which one is compatible for your smoker and gives the best result.
Let’s talk like a bunch of scientists. When the temperature reaches 100° C (or 212° F) inside the smoker, the water in the water pan starts to evaporate leading to humidification and moisture of meat. If we replace the water with any sort of juice to give the meat an extra flavor, it won’t. The water in juice will evaporate, leaving the concentrated juice behind in the tray.
Maybe that is why Masterbuilt called it water pan and not a juice pan.
Temperature
Maintaining temperature is relatively easier but knowing exactly at what temperature your meat gets fully cooked is tough. It is important to know that different meats require slightly different temperature to get the perfect result. So whether you are cooking brisket, ribs, lobster or chicken, it is crucial to know the duration and temperature required to get that succulent meat to satisfy your taste buds.
Quick Guide on How to use Masterbuilt propane smoker
Step 1: Perform soapy water test before turning on the valve of the gas cylinder.
Step 2: Add wood chips in the tray found on top of the burner.
Step 3: Add water in the water pan. This pan is found on top of the wood chip tray.
Step 4: Start the propane smoker by pushing the temperature control knob and shifting it counterclockwise and at the same time, push the ignitor. You will start to see the flame, however, hold the knob for few seconds so that the burner keeps burning.
Step 5: Set the temperature accordingly.
Step 6: Insert your well-marinated food in one of the racks, trust your smoker and let it do its magic.
Step 7: Keep checking your food and propane smoker after every 30 minutes in case if the smoker requires a new batch of wood chips.
Step 8: Bring out that delicious and succulent meat and relish every bite of it with your favorite drink!
Tip: Place a tray covered with aluminum foil beneath the rack where you have put your food. This makes it less time-consuming for you to clean the smoker later.
Conclusion
When it comes to buying a smoker, Masterbuilt is considered the most reliable brand for it – and there’s no doubt about that. If you ever want to feel like a friendly neighborhood BBQ-man in your town, you now know where to go and what to buy.
Now that you have learned to assemble, season and smoke your propane smoker, what is stopping you from throwing an extravagant party like a Gatsby at the back of your house? Go on and smoke your very first meat or best meat and let us know if this guide was helpful! Comment down your queries so that one of our BBQ-man could clear your confusion.
FAQ
How do I maintain the temperature of my propane smoker?
The exhaust damper play an important role when it comes to maintaining the temperature. Open or shut it according to the desired temperature you want for your meat. For more accurate reading, you can also get an external thermometer for your smoker.
Why is my propane smoker not getting hot enough?
Make sure the exhaust damper behind your smoker is open wide enough to take in the oxygen from surrounding as oxygen helps in increasing the heat.
The leakage of smoke could also be the reason why your smoker isn’t reaching the desired temperature so make sure its door is properly sealed.
How can I perform the soapy water test on my propane smoker?
In order to perform the soapy water test, you must prepare the solution. Take dish liquid and mix it with water. Before applying this solution on the gas cylinder valve and its hose, make sure the valve is turned off. Switch on the valve after applying the solution and look for the bubbles. If you see bubbles it means there’s a gas leakage that needs to be fixed.
How many times should I season my Masterbuilt Propane Smoker?
If you are an owner of a brand-new propane smoker then you must season it only once before using it for the first time. However, if your smoker gets really greasy after using it several times, you can think of reseasoning it. It’s better if you clean the interior of the smoker right after you are done using it.
How do I prevent my wood chips from burning?
The easy way to stop your wood chips from catching fire is to wrap it up in an aluminum foil. This aluminum pouch allows you to use the wood chips for a longer duration.